Bedside table — Build Guide
A clean, compact mid-century cubby nightstand in solid yellow birch on 14" tapered steel legs. 16" W × 12" D × 21" H overall, sized to sit flush and level with an IKEA MALM bed and nightstand setup.
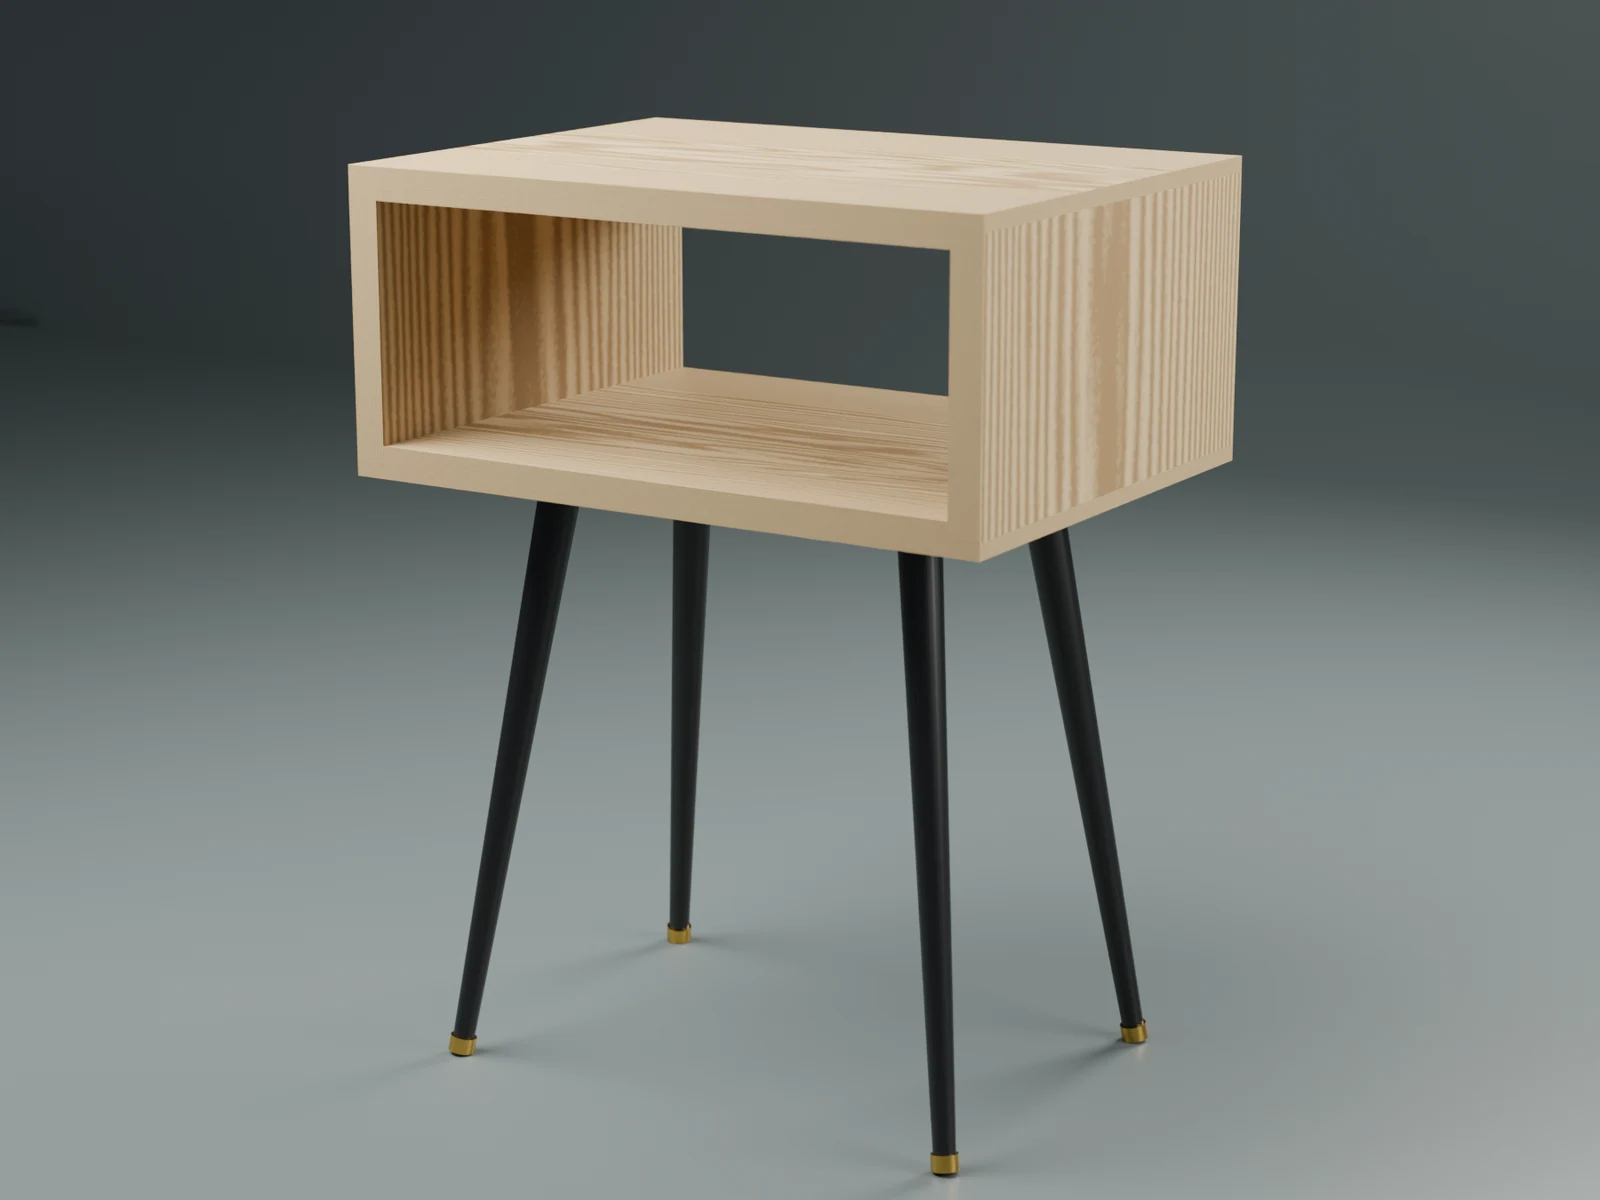
0. Cut List & Stock Sourcing
Finished Dimensions of the 4 Boards (Rabbet Joinery)
All boards are 3/4" (0.75") thick solid yellow birch planed flat:
| Component | Quantity | Finished Size (L × W × T) | Joinery Details |
|---|---|---|---|
| Top Board | 1 | 16.00" × 12.00" × 0.75" | 3/8" deep × 3/4" wide rabbet on inside face at both ends |
| Bottom Board | 1 | 16.00" × 12.00" × 0.75" | 3/8" deep × 3/4" wide rabbet on inside face at both ends |
| Side Panels (2) | 2 | 6.25" × 12.00" × 0.75" | Clean square 90° crosscuts; nest into the top & bottom rabbets |
- Clear Internal Cubby Opening: 14.50" W × 5.50" H × 12.00" D.
- Overall Height on 14" Legs: 21.00" nominal (level with MALM mattress line).
Lumber Sourcing
Total board length needed: 16 + 16 + 6.25 + 6.25 = 44.5" (~3.7 linear feet).
- Lumber: One 4-foot to 5-foot board of 4/4 Yellow Birch surfaced to 12" wide (or edge-glued from two 6-1/2" boards).
- Surfacing: S2S to 3/4" thickness with one straight-line ripped edge (SLR1E).
1. Hardware, Tools & Consumables
Hardware
- Legs: 4 × 14" mid-century tapered steel legs (KaizeooHaus or similar) with angled mounting plates and threaded floor leveler glides.
- Screws: 16 × #8 × 5/8" pan-head wood screws (short enough not to poke through the 3/4" bottom board).
Shop Tools Used
- Circular saw (or mitre saw) + straight edge: For clean 90° crosscuts to size the 4 boards.
- Mastercraft 2 HP Plunge Router: For cutting the four 3/8" deep × 3/4" wide rabbets. - Bit: Standard 1/2" or 3/4" straight carbide router bit. - Guide: Clamped straight edge / level offset by router base radius.
- Clamps: 2 to 4 pipe clamps or 24" F-clamps for vertical clamping; 1 clamp across width for seating against rabbet shoulder.
- Drill / Driver: DeWALT 20V with 3/32" pilot drill bit and driver bit.
- Measuring: Tape measure, combination square, digital caliper, pencil.
Consumables
- Glue: Titebond II (standard PVA wood glue).
- Abrasives: 120, 180, and 220 grit sandpaper + sanding block.
- Finish: Hardwax oil (Osmo Polyx-Oil 3043 satin) or Danish oil.
2. Step-by-Step Order of Work
Step 1 — Crosscut the 4 Boards to Length
- Square one end of the 12"-wide birch board with your circular saw against the clamped straight edge.
- Cut the Top board to exactly 16.00".
- Cut the Bottom board to exactly 16.00" (clamp Top and Bottom together to verify identical length).
- Cut the two Side panels to exactly 6.25" (6-1/4").
Step 2 — Route the 3/8" Rabbets on Top & Bottom Panels
      OUTSIDE FACE (16" Top Board)
+──────────────────────────────────────────+
│                                          │
└───┐                                  ┌───┘
 3/8"│ 3/4"                      3/4"  │3/8"
     +─────────────────────────────────+
INSIDE FACE- Secure the workpiece: Clamp the Top board flat to your workbench, inside face pointing up.
- Set the router guide: - Chuck a 1/2" or 3/4" straight carbide bit in your plunge router. - Measure the exact distance from the edge of your router's sub-base to the cutting edge of the bit. - Clamp your straight-edge guide parallel to the end of the board so the bit routes exactly 3/4" wide from the end.
- Make 2 shallow depth passes: - *Pass 1*: Set plunge depth to 3/16" (half depth). Make a steady, smooth pass across the 12" width. - *Pass 2*: Plunge to the final 3/8" (0.375") depth. Make the final cleaning pass.
- Repeat for the other end of the Top board, and both ends of the Bottom board (4 rabbets total).
- Dry fit: Slip a 6-1/4" side panel into the rabbet recess. It should seat dead-flat against the shoulder with the outer faces perfectly flush.
Step 3 — Edge Treatment: Eased Arrises vs Chamfers
> [!TIP] Why Eased Edges Beat Chamfers on Rabbet Casework > On a 45° miter, a chamfer works because the joint seam is dead-center on the 45° corner. > On a rabbet joint, however, the joint seam is located 3/8" down the side face. A 45° router > chamfer on the corner cuts across the joint at an offset and visually clashes with the joinery. > > The Scandinavian / Japandi standard: > - Keep all outer planar corners square. > - Hand-ease the arrises with a sanding block loaded with 220-grit paper (a subtle ~1/32" softening). > - This feels silky and pleasant in hand while keeping the architectural lines clean and pure. > - *(Optional)*: If you want to use your chamfer bit, run a light 1/8" chamfer ONLY around the > *inside* opening rim (where hands reach into the cubby).
Step 4 — Pre-Finish the Interior (Shop Secret)
- Sand the inside faces of all 4 boards to 180 and 220 grit.
- Apply one coat of Osmo Polyx-Oil or finish to the inside faces only.
- Keep the finish 1/4" away from the rabbet gluing faces (mask with painter's tape).
- Any glue squeeze-out during assembly will not adhere to the finished wood and pops right off with a damp cloth!
Step 5 — Glue-Up & Clamping
Unlike miters, rabbet joints are self-squaring: the 3/8" internal shoulder mechanically traps the side panels square under clamp pressure.
- Lay the Bottom board flat on the bench, rabbet pockets facing up.
- Spread PVA glue (Titebond II) evenly along the rabbet shelves and shoulders.
- Place the two 6-1/4" side panels upright into the bottom rabbets.
- Apply glue to the top ends of the side panels and top rabbets, then place the Top board on.
- Apply clamping pressure: - Place 2 to 3 bar/pipe clamps vertically across the carcass (pressing Top and Bottom into the sides). - Snug the clamps gently. Check for square with your combination square (the rabbets should automatically align it). - If needed, place 1 clamp horizontally across the width to snug the sides against the internal shoulders. - Tighten clamps firmly. Wipe off any squeezed-out glue.
- Leave in clamps for 1 to 2 hours.
Step 6 — Final Sanding & Finishing
- Once fully cured, unclamp the box.
- Sand the exterior faces flush: - Start with 120 grit on a random orbital sander (or sanding block) to ensure the 3/8" top/bottom lips are flush with the sides. - Progress through 180 and 220 grit across all faces.
- Hand-ease all edges with 220-grit paper on a cork/rubber sanding block.
- Clean off all dust.
- Apply 2 thin coats of Osmo Polyx-Oil 3043 (or Danish oil), buffing between coats with 0000 steel wool or a maroon Scotch-Brite pad.
Step 7 — Leg Installation
- Flip the finished box upside down onto a soft blanket.
- Position the 4 mounting plates inset 1.75" from each outer edge.
- Align the angled legs so they lean outward symmetrically toward each of the 4 corners.
- Mark the 16 screw holes.
- Drill pilot holes using a 3/32" drill bit with tape wrapped at 1/2" depth (to prevent drilling through).
- Drive the #8 × 5/8" screws securely.
- Flip upright onto its brass leveler feet. Adjust the threaded brass glides to level the table perfectly beside the bed.